Prototyping:
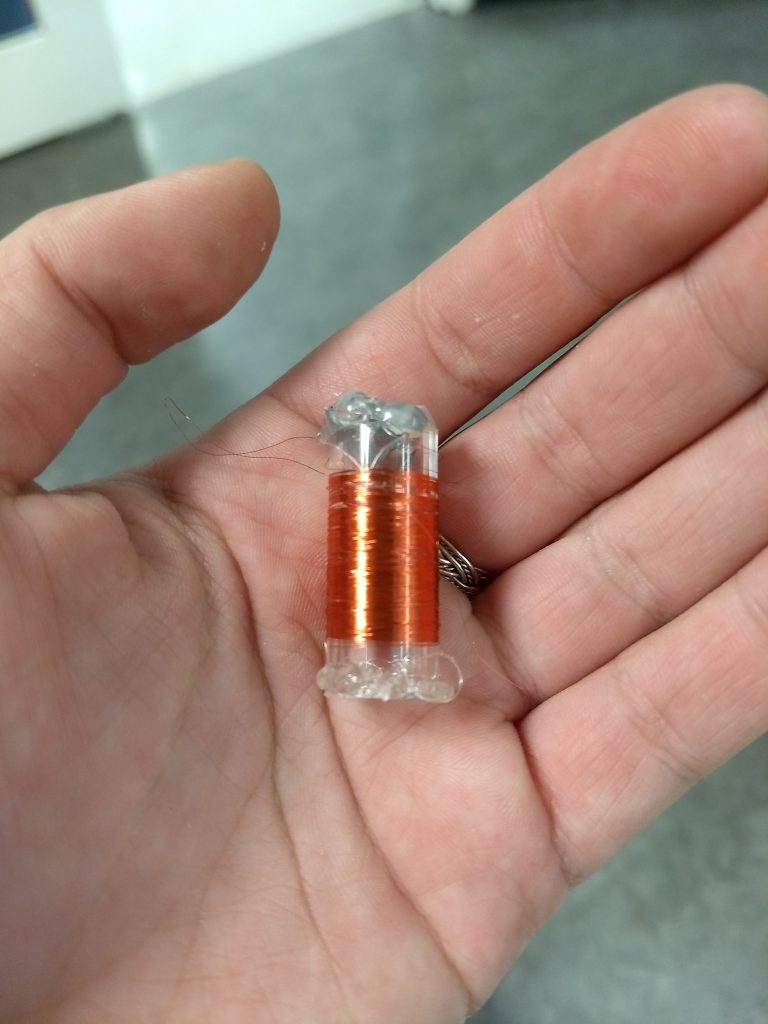
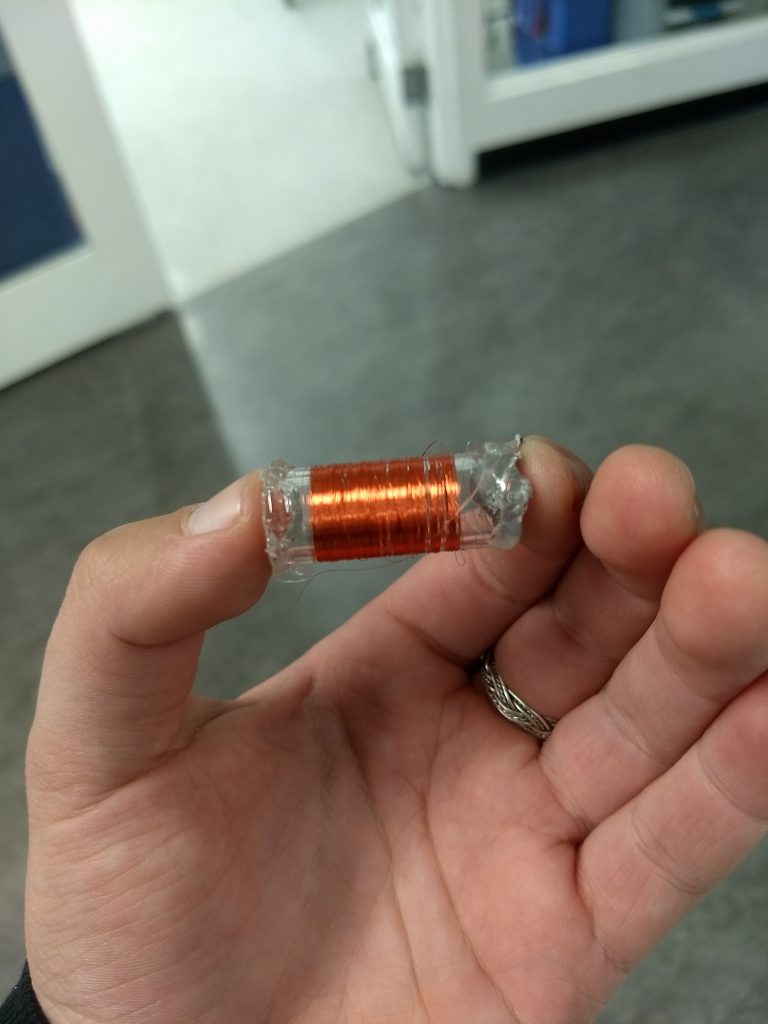
Prior to our magnet arriving, we decided to prototype the pickup using a small piece of plastic pipe and some of the 42 AWG wire. The goals with this exercise were to practice the actual winding of the wire (using the drill) as well as to become familiar with the properties of the wire, which is extremely thin and easily breakable.
After cutting a couple inches of pipe, we need a way to mount it on the drill, so we covered the tip of a drill bit in masking tape, and then hot-glued the pipe to the tape. This allowed the pipe to turn with the drill without harming the drill or bit in any way. We then put the spool of wire on a screwdriver, held horizontally, so that it would be able to freely feed wire to the turning pipe. We found that it would be important to securely anchor the starting free end of the wire using hot glue prior to starting to wind, as the wire is so fine it would be very easy to lose it or have it slip around. We also learned that the location of the wire on the pipe as we are winding is difficult to control precisely, so it would be best to stay away from the end of the magnet when coiling.
Please see below: two images of the prototype.
The Build (Attempt #1):
COILING-
Once the items that we ordered arrived, we set to work on constructing the apparatus. First, we placed the neodymium magnet on the tip of a handheld power drill, which happened to be a ferrous material. This allowed us to easily coil up the wire around the magnet by using the throttle of the drill to (at a safe speed, of course) rotate the magnet, and simultaneously wind the 42 AWG wire, which was being fed from a spool. After turning the wire for 30 minutes, we removed the magnet from the drill, and hot glued the ends of the coil to the magnet, leaving extra cable dangling off from the ends so that we could later solder them to thicker cables.
Please see below: an image of the magnet and coil.

SOLDERING-
Once the induction pickup was completed, we moved on to soldering the pickup. We used two pieces of rubber coated copper wire, stripped the ends using a wire cutter/stripper, wound the loose ends of cable around the mounts on the pickup, and soldered a connection. Once this was completed, we slid protective rubber shields over the cable, which were going to be shrunk later using a heat gun on as a measure to prevent the thin copper wire from breaking. We then began to solder the 42 AWG wire to the loose ends of the stripped cables.
At first, this was working great. However, shortly thereafter we found that it was incredibly easy to accidentally break the 42 AWG wire. We attempted to mend the situation several times by breaking the soldered connection, re-cutting and stripping the insulated wire, and then re-soldering the two cables together, but each time the mend ended up failing either due to 42 AWG wire breakage or other mechanical errors (such as the soldering iron shrinking the rubber shielding, and making it impossible to slide it over onto the thinner wire without repeating the above method, again). Eventually, we realized that there was several breaks in the coiled 42 AWG wire, so we had no choice but to cut the wire off of the magnet, and start again from square one – this time, with thicker wire.
The Build (Attempt #2):
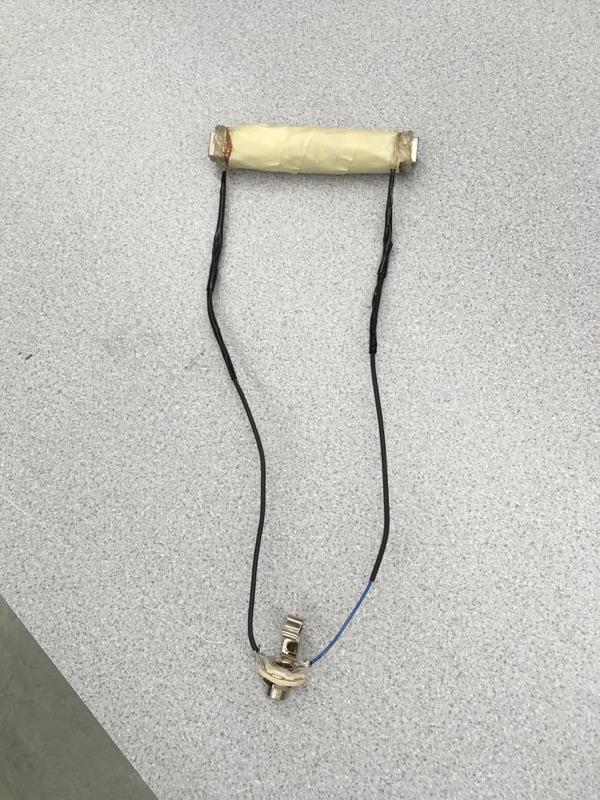
For our second attempt, we approached the project with the same methods as before except with 26-gauge copper wire, instead of 42. This wire proved much more durable, and we were very successful working with it. We found that in one minute, we were able to wrap the wire around the magnet approximately 50 times, so we estimate that the total number of turns in our coil is approximately 700. Pictured below.

We then wrapped the entire coil in masking tape to secure and protect, and we also secured the ends of the coil in place with hot glue. Pictured below.

We then soldered the ends of the wire to pieces of insulated wire which were, in turn, soldered to a ¼” TRS jack. Pictured below.
The Next Step:
Our next step will be to begin experimenting with the pickup, investigating what kinds of sounds we’ll be able to capture and which methods will be most effective. We will use a ¼” TRS cable to run the pickup through an audio interface into Audacity, to capture samples.
awesome progress! One other thing you may want to do — high end guitar pickups are wax dipped so that the wires don’t move when subject to the changing magnetic field from the string motion. You may want to do this too, although I am not sure if it would make a noticeable difference.
I’m shocked that your first build attempt took 30 minutes… Is that purely because the wire was so thin, so it took much more time to coil?